Overview
This guide explains how to prepare and upload inventory adjustments using the Upload Inventory Adjustments – Copy/Paste from Excel utility (Advanced > Administration > Utilities). It covers how to extract the initial data, modify it correctly, and upload it safely.
Inventory Adjustments and Released Orders
When adjusting inventory for a specific SKU and Location, it is critical to understand how released orders are impacting the available quantities.
If orders have already been released, the associated units may:
- Still be physically on hand, or
- Have already been picked and/or packed
This distinction is not always obvious unless you know whether all, some, or none of the committed units have been picked.
Before making any adjustment, confirm the picking status of committed inventory.
✅ Important:
This adjustment tool only modifies the Available to Allocate quantity (units available for new orders).
❌ You cannot adjust committed quantities using this tool. If committed units have already been allocated to released orders, they must be resolved through the appropriate picking, packing, or order management workflow.
Failure to account for committed inventory may result in inaccurate stock levels or over‑allocation.
1. Getting the Initial Data
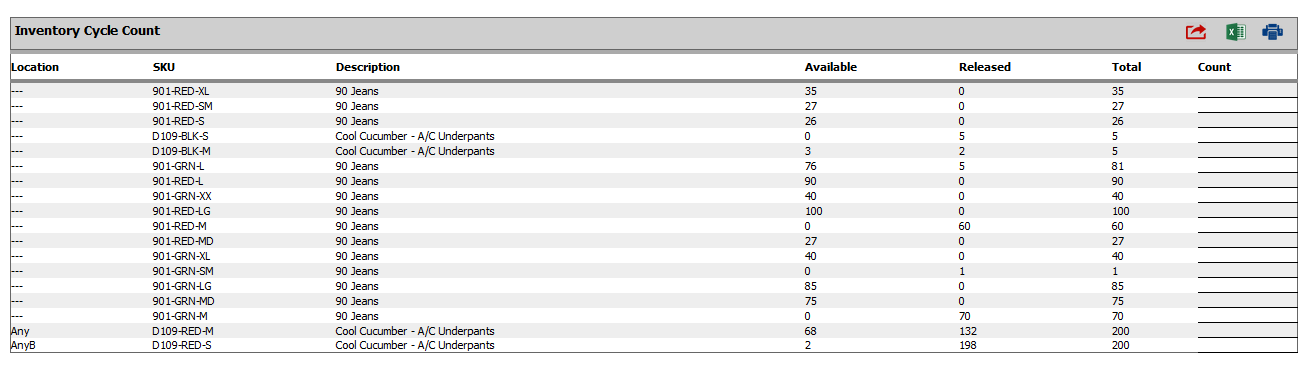
To make wide-scale inventory adjustments—such as during a line list cycle count—the best source of data is the Inventory Cycle Count report.
- Navigate to:
Inventory Tab → Report Type: Inventory Cycle Count
(Use the “(New)” inventory reports)
⚠️ Tip: Run this report when there are no released or unpacked orders. The report assumes the count reflects units physically in a location and not assigned to orders. If an order is released but items remain in the location, they may be double-counted.
2. Exporting to Excel
Click the green Excel icon in the top-right corner of the report to export the data into a spreadsheet.
All further work will be done in this exported spreadsheet.
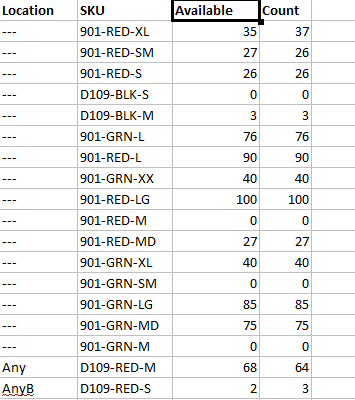
3. Preparing the Spreadsheet
Required Columns
- Location
- SKU
- Available (Old Quantity)
- New Count (New Quantity)
❌ Exclude lines without a new count.
🧹 Remove unnecessary columns:
- Description
- Released
- Total
4. Uploading the Modified Data
Use the utility located at:
Advanced → Utilities → Upload Inventory Adjustments – Copy/Paste from Excel
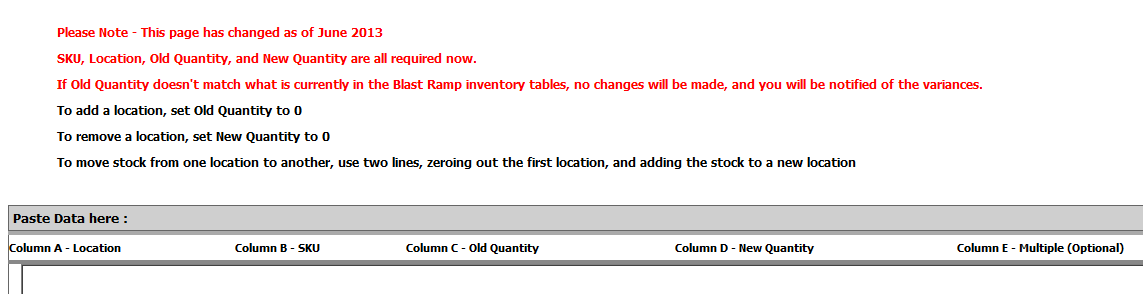
Best Practices
- First Run: Leave the Commit Adjustments flag off to preview results.
- Final Run: If everything looks correct, re-upload with the Commit flag on.
🚫 Do not include column headers in the pasted data.
✅ Each row must contain:
- Location
- SKU
- Old Quantity
- New Quantity
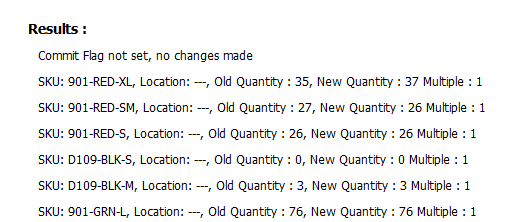
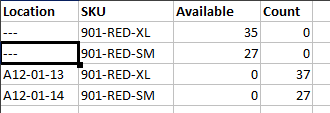
The results of a good upload would look like this :
5. Moving Product Between Locations
However, when updating the inventory quantities, make sure to only complete the below two steps to ensure the stock is correctly moved between locations (you can also add inventory here at the same time):
- Zero out the quantity in the old location.
-
Add the product to the new location using an old quantity of
0.
E.g :
CLICK HERE TO VIEW VIDEO LOCATION TRANSFER OF INVENTORY